Planting sod in Holly Springs, NC takes more than rolling grass over dirt and hoping it holds. Between heavy clay soil, humid summers, and a narrow installation window for each grass type, skipping a step here means a patchy lawn by the time summer heat hits. This guide walks through the exact sequence a local crew follows, from site assessment to the first 30 days of watering.
When Is the Best Time to Plant Sod in Holly Springs, NC?
Timing matters more than most DIY guides admit. Plant too early or too late and the sod sits there without rooting, no matter how well you prepped the soil.
Warm-season varieties like Bermuda and Zoysia follow a specific calendar. Warm-season grasses are best established by sodding at the same dates suggested for seeding, about March 1 until July 1 in the Piedmont. That window exists for a reason: warm-season sod does not produce roots unless the soil temperature exceeds 55°F for several weeks . Install before the ground warms and the sod just sits dormant, losing root mass instead of gaining it.
Tall Fescue runs on a different schedule. Cool-season grass sod may be installed successfully anytime in the cooler portions of the growing season when the ground is not frozen , which makes fall and late winter the more reliable windows for fescue lawns in Holly Springs.
Step 1: Assess Your Yard Before You Order Sod
Walk the property first. A few minutes of observation now saves hours of rework later.
Check for:
- Slope and grade changes that could cause sod to slide before it roots
- Low spots where water pools after rain
- Full sun, partial shade, and deep shade zones
- Surface tree roots near the planting area
- Condition of the existing grass and bare patches
- Equipment access for delivery and grading
Every yard we grade in Holly Springs tells a different story, but the ones that give us the most trouble are new-construction lots where builders left compacted red clay just a few inches under a thin layer of topsoil. That compaction, not the grass variety, is usually what kills a new lawn.
Not sure what your lot needs? Our Holly Springs service area page covers what crews typically run into locally.
Step 2: Measure Your Lawn and Order the Right Amount of Sod
Multiply length by width for each lawn section in feet, then add the sections together for total square footage.
Order too little and you're paying rush fees for a second delivery. Order blind and you overpay for pallets that sit around and dry out.
- Measure every section separately, including odd angles around beds and driveways
- Add 5 to 10% overage for curves and cuts
- Convert total square footage into pallets using your supplier's coverage rate per pallet
Step 3: Choose the Right Sod Type for Holly Springs Soil and Climate
Grass selection comes down to how well a variety handles hot, humid summers, cooler winters, and heavy clay. Bermuda, Zoysia, and Tall Fescue are the three most common choices locally, each with real tradeoffs.
| Sod Type | Season Type | Best Planting Window | Shade Tolerance | Traffic Tolerance |
|---|---|---|---|---|
| Bermuda | Warm-season | March–July | Low | High |
| Zoysia | Warm-season | March–July | Moderate | High |
| Tall Fescue | Cool-season | Fall, late winter | Good | Moderate |
Bermuda establishes fast and tolerates heat and foot traffic well, but it goes dormant and turns brown once winter arrives. Zoysia is denser and more shade-tolerant than Bermuda, though it establishes more slowly. Tall Fescue stays green through winter and handles partial shade, but it struggles in peak summer heat without extra watering.
Soil pH plays a bigger role in grass performance than most people expect. Turfgrasses used in North Carolina grow best in soils with a pH near 6.5, except centipedegrass, which prefers a pH near 5.5 , and Holly Springs' naturally acidic clay rarely starts in that range without lime.
That's worth checking before you buy sod, not after. Soil testing is free for North Carolina residents through the NCDA&CS Agronomic Services homeowner program, and the results tell you exactly how much lime to work in before delivery day.
Step 4: Prepare the Soil (Clay Needs Extra Work)
Soil preparation is where most DIY sod jobs succeed or fail. It deserves more attention than it usually gets.
- Kill existing grass and rake away the dead debris.
- Till the soil 4 to 6 inches deep to break up clay compaction.
- Mix in 1 to 2 inches of compost across the surface.
- Apply starter fertilizer and lime based on your soil test results.
- Grade the lawn so soil sits 3/4" to 1" below driveways and sidewalks for proper drainage.
- Roll the area with a water-filled push drum for firm, even soil contact.
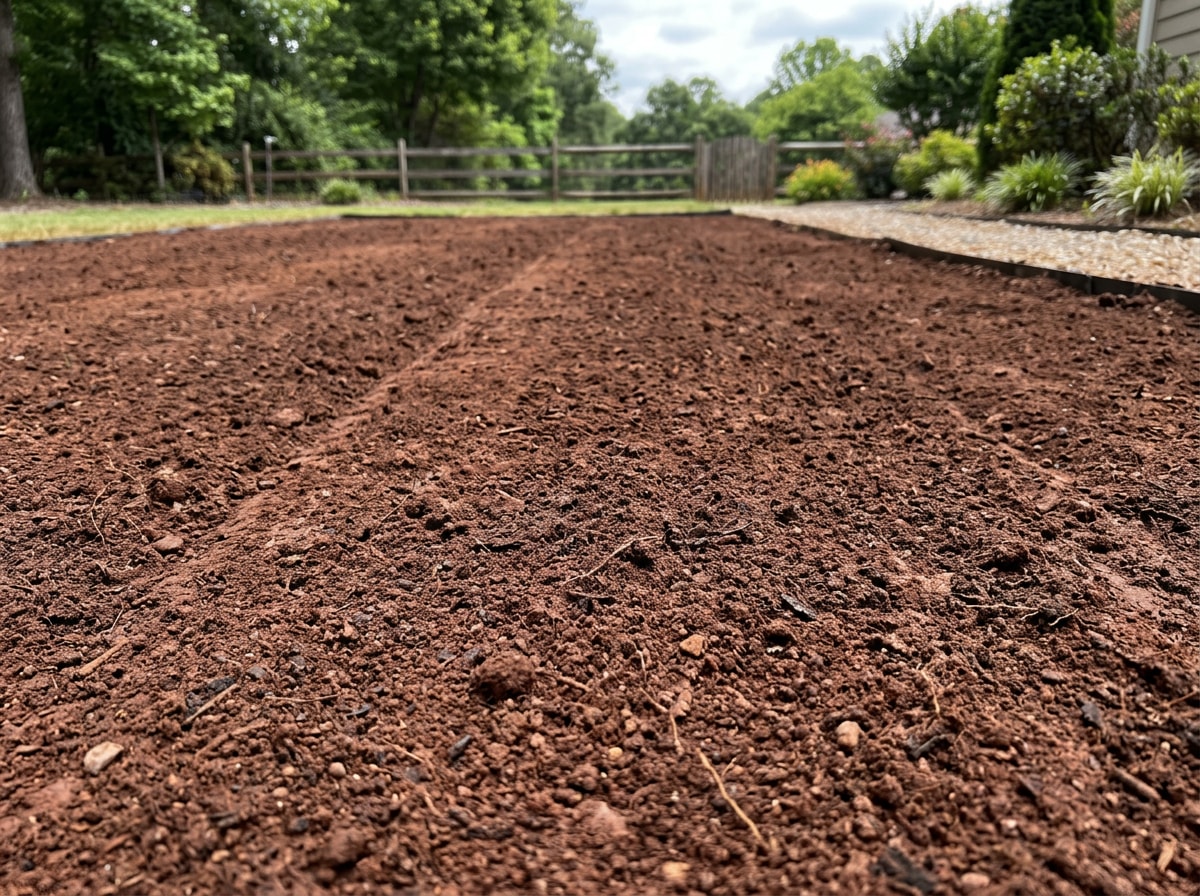
If grading and drainage correction turns into more than a weekend project, a site preparation crew can handle the tilling, amendment, and grading in a single visit.
Step 5: Lay the Sod Correctly
Install the sod within 24 hours of delivery and keep it in the shade to lessen the chance of heat buildup while you work. Stacked pallets heat up fast in Holly Springs' summer sun and can cook the grass before it ever reaches the ground.
Start by bordering gardens, walkways, and driveways first, which gives you clean edges to work inward from. Place the first row along the longest straight edge, then stagger seams in a brick-like pattern so no four corners meet at one point.
If your yard has slope, lay sod lengthwise across the face of slopes, and peg or stake the pieces to prevent slippage while roots establish.
Press each piece down firmly by hand or with a roller to eliminate air pockets between sod and soil. Gaps here are a leading cause of dead patches. Avoid using small sliver pieces at edges, since they dry out faster than full-size rolls and often die first.
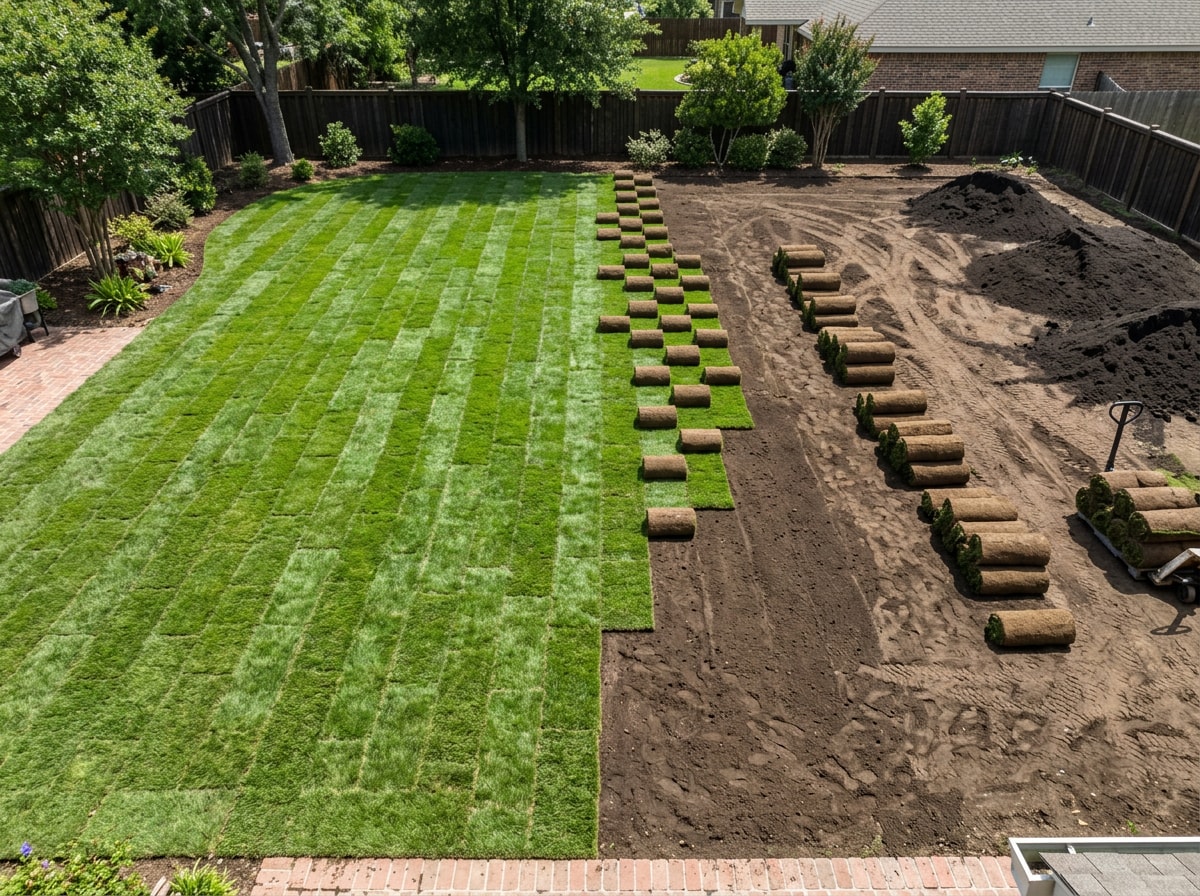
If this step feels like more than you want to take on, a landscape contractor can handle grading through final rolling in a single project.
Step 6: Water and Care for New Sod the First 30 Days
New sod needs daily watering for the first two weeks, enough to keep it consistently moist without pooling on the surface. Standing water is a sign of overwatering, and watering too frequently can drown plants or result in shallow roots , which works against everything you just did in soil prep.
A simple way to check your output: place a few empty tuna cans around your lawn while you're watering and measure how long it takes your sprinkler to fill them with a half inch of water . That's a quick way to calibrate sprinkler run times instead of guessing.
Hold off on mowing until the sod resists a gentle tug. That resistance means roots have anchored into the soil below.
After the first two weeks, shift to deeper, less frequent watering sessions to encourage roots to grow down instead of staying near the surface. Pull back a corner of sod and feel for a thin film of moisture underneath. If it's dry, water again that day.
For more detail on calibrating irrigation and avoiding runoff, see the EPA WaterSense watering tips.
How Much Does Sod Installation Cost in Holly Springs, NC?
Cost depends on three things: sod type, square footage, and how much grading or soil correction your yard needs before sod goes down. A flat, already-graded lot costs far less to sod than a yard with compacted clay, drainage problems, or a steep slope.
Fescue tends to cost more per pallet than Bermuda, and any yard requiring deep tilling, trucked-in topsoil, or drainage correction adds labor on top of material costs. For a detailed regional pricing breakdown by project size, see our landscaping cost guide for the Triangle area.
Want an exact number for your yard instead of a range? Get a free estimate and we'll price grading, soil prep, and sod together as one project.
Frequently Asked Questions
What is the best time of year to plant sod in Holly Springs, NC?
Warm-season sod (Bermuda, Zoysia) establishes best between March and July, once soil temperatures stay above 55°F for several weeks. Tall Fescue can go in anytime the ground isn't frozen, with fall being the most reliable window.
What type of sod is best suited for Holly Springs' climate and soil conditions?
Bermuda handles heat and heavy foot traffic best but goes dormant in winter. Zoysia is denser and more shade-tolerant but establishes more slowly. Tall Fescue stays green year-round and tolerates partial shade but needs more water in summer heat. All three can adapt to clay soil once it's properly prepared.
How long does it take for new sod to establish and root in Holly Springs' climate?
New sod typically begins rooting within the first two weeks after installation, provided it gets consistent watering during that window. Humid summers speed up establishment, while cooler winter months can slow the process down by several weeks.
Does clay soil affect the success of sod installation?
Clay soil can limit root penetration if left untreated, but amending it during prep largely solves this. Tilling 4 to 6 inches deep, adding compost, and correcting pH with lime lets most grass varieties adapt successfully to clay over a single growing season.
How often should new sod be watered?
New sod needs frequent, light watering for the first two weeks to keep roots consistently moist, without pooling water on the surface. After that, shift to deeper, less frequent watering sessions as the root system pushes further into the prepared soil below.
Can I walk on new sod right away?
Avoid foot traffic until the sod passes the tug test, meaning a gentle pull no longer lifts the edge. Walking on sod before roots anchor can shift seams and create gaps that dry out and die.
Do I need to remove the old grass before laying sod?
Yes. Kill existing grass first, rake away the dead material, then till the soil underneath. Laying new sod directly over live or dead turf blocks root contact with the soil and leads to early failure.
Ready to skip the weekend labor? Paradise Backyards LLC handles grading, soil prep, and sod installation for homeowners throughout Holly Springs and the greater Triangle. Contact us for a free estimate.